This job aid will guide a user through utilizing the new Smartpicks feature when estimating a loss from a Floorplan. Smartpicks is a feature that must be enabled for your company and is also dependent on using a USDC database dated February 2026 and beyond. The job aid describes how to access Smartpicks and use the tool to help accelerate and streamline the estimating process by determining appropriate line items to add to an estimate based on certain criteria – room type, peril type and loss province/state.
Note: This document was created using a demo insurance company with generic settings. Keep in mind that your screens may appear slightly different. Please refer to your specific carrier guidelines for proper claim and estimate settings.
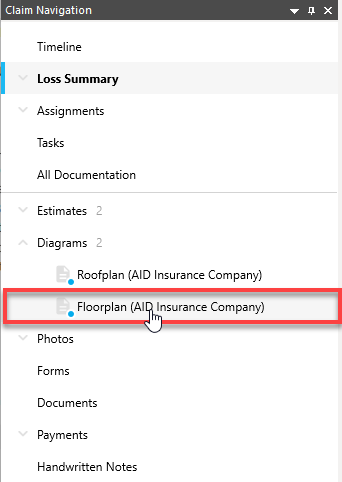
- From the Claim Navigation pane, click a Floorplan to open the diagram.
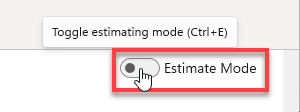
- If Estimate mode is not already On for your diagram, toggle the switch to enable Estimate Mode and to display the Item Database panel.
- From the tabs within the Item Database panel, select Smartpicks.
 Note: If you are in a Roofplan or Exterior plan, the Smartpicks tab will be hidden.
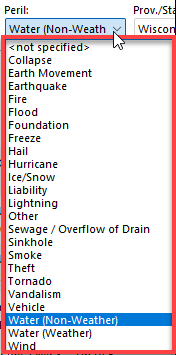
 - The Peril and Loss Prov./State information will prefill from the Loss Summary. Edit the selections, if necessary.

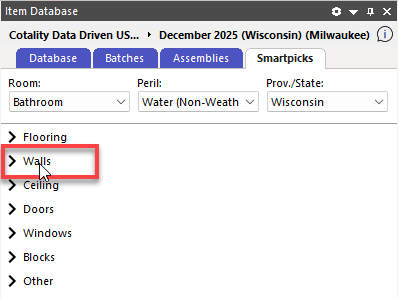
- Select the room by highlighting the room from the Floorplan.
 Note: This can also be accomplished by selecting the room from the Room dropdown menu.
 - Next, from the list of available options, choose the area of the room you wish to estimate first.
- Select the line item(s) from the list to drag and drop to the Floorplan.
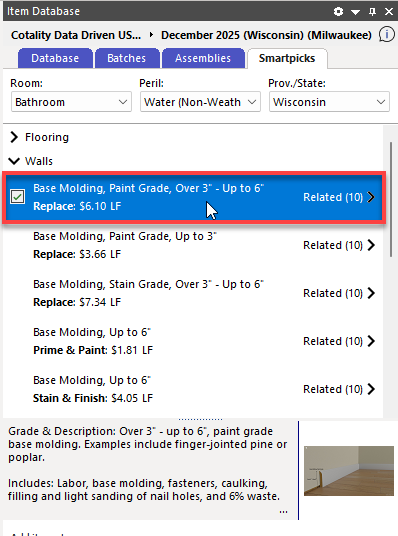
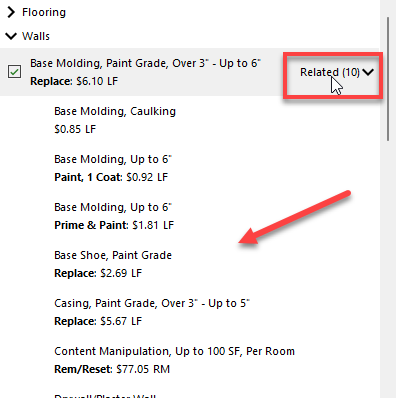
- Click Related to be presented with a dropdown list of [up to] 10 line items related to the original highlighted item in the list.
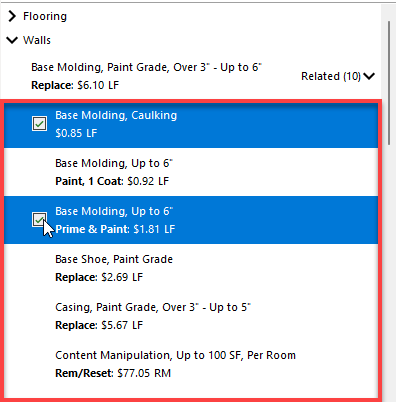
- Select the line item(s) from the list to also drag and drop to the Floorplan.
- Repeat steps 6 to 9 as needed until completed.
Was this article helpful?
That’s Great!
Thank you for your feedback
Sorry! We couldn't be helpful
Thank you for your feedback
Feedback sent
We appreciate your effort and will try to fix the article